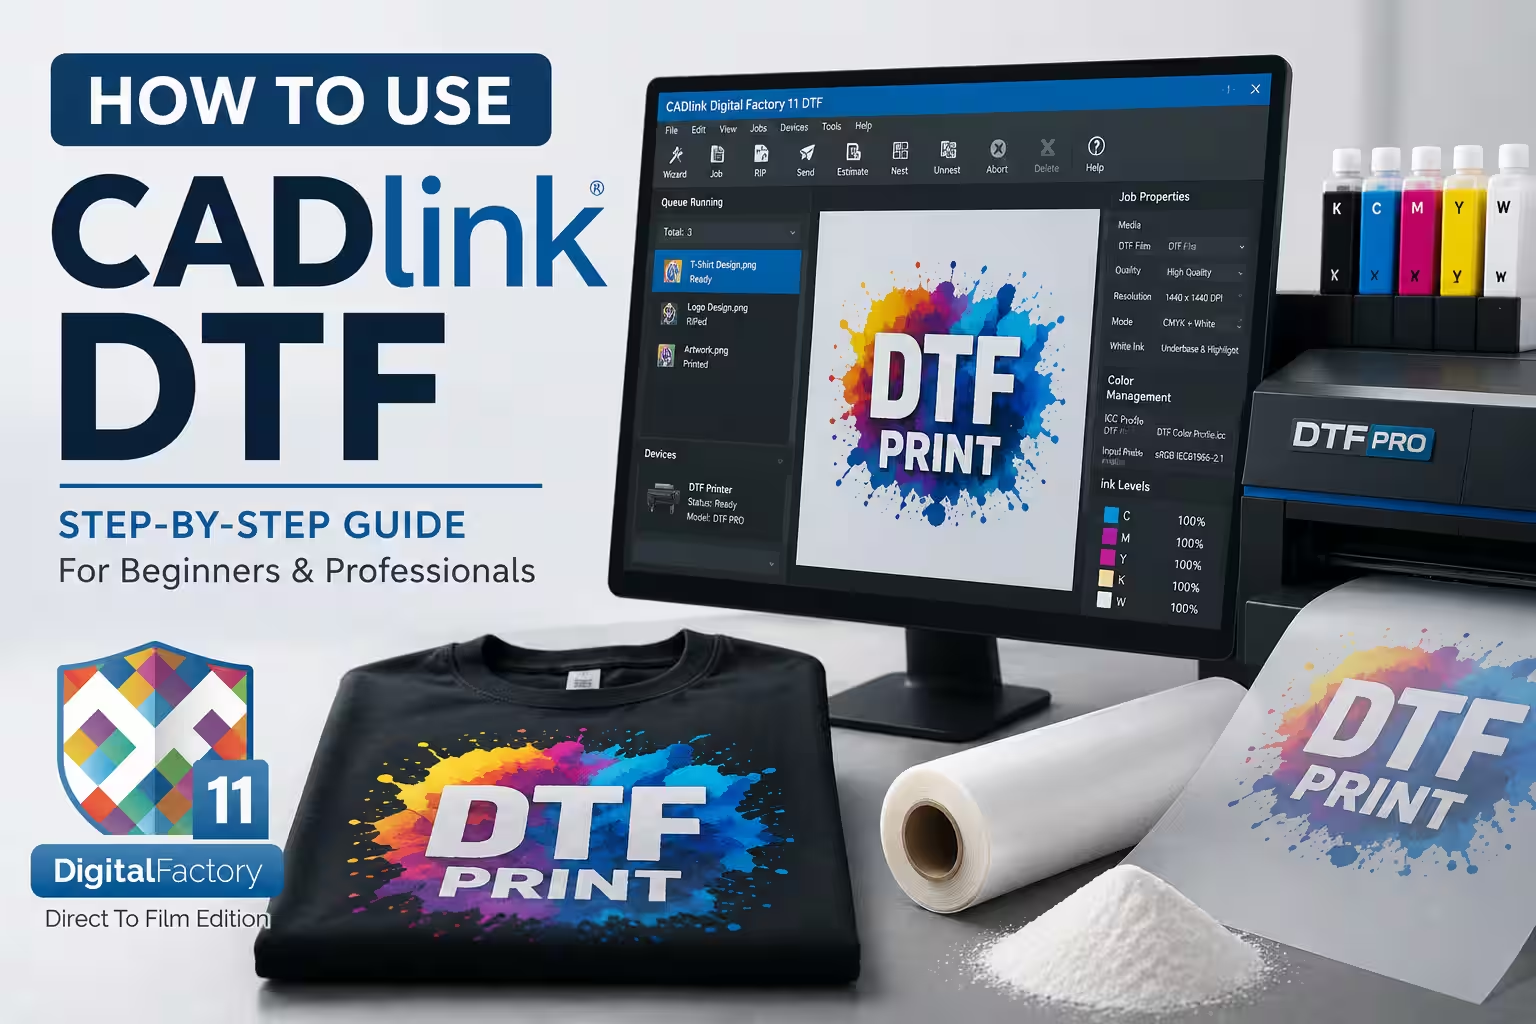
Learning how to use CADlink DTF is essential for creating high-quality Direct-to-Film (DTF) transfers. Direct-to-Film (DTF) printing has transformed the garment decoration industry by providing vibrant colors, exceptional durability, and compatibility with a wide range of fabrics. This guide explains how to use CADlink DTF step by step, from installation and printer setup to printing and heat pressing.
This comprehensive guide explains how to use CADlink DTF from installation to final transfer, including printer setup, artwork preparation, printing, powder application, curing, and heat pressing.
What is CADlink Digital Factory DTF?
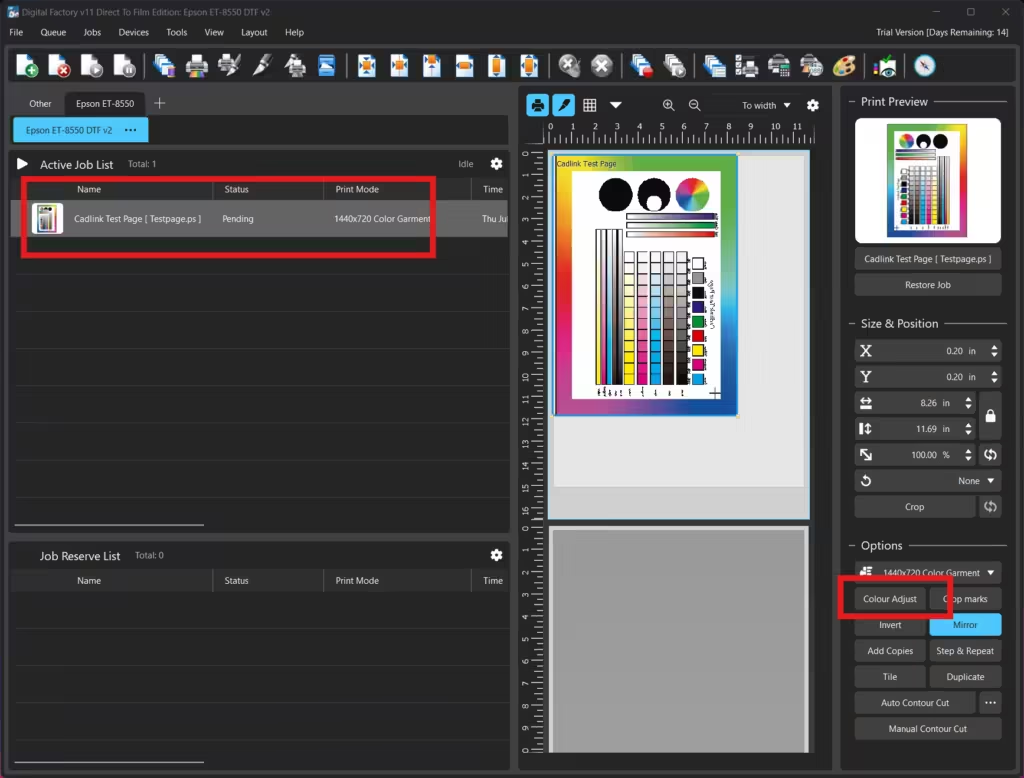
CADlink Digital Factory DTF is professional RIP (Raster Image Processor) software specifically designed for DTF printing workflows. It converts artwork into printable data while managing:
- White ink generation
- Color management
- ICC profiles
- Print queues
- Ink usage optimization
- Mirror printing
- Printer communication
- Resolution settings
Unlike standard printer software, CADlink gives complete control over every aspect of DTF production.
System Requirements
Before installing CADlink DTF, ensure your computer meets these recommendations.
Operating System
- Windows 10 (64-bit)
- Windows 11 (64-bit)
Processor
- Intel Core i5 minimum
- Intel Core i7 or AMD Ryzen recommended
Memory
- 8 GB RAM minimum
- 16 GB or more recommended
Storage
- SSD recommended
- At least 20 GB free disk space
Display
- 1920 × 1080 resolution recommended
Installing CADlink Digital Factory DTF
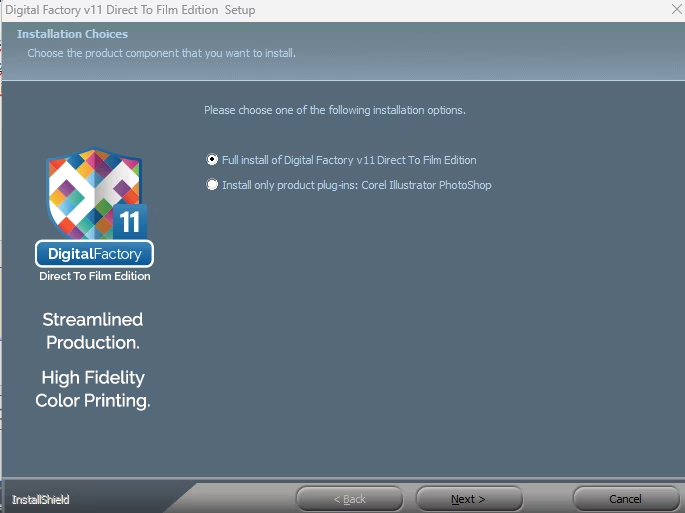
Installation is straightforward.
Step 1
Download the CADlink installer.
Step 2
Run the installer as Administrator.
Step 3
Follow the installation wizard.
Step 4
Install the required printer drivers.
Step 5
Activate your license.
After activation, restart the software.
Connecting Your DTF Printer
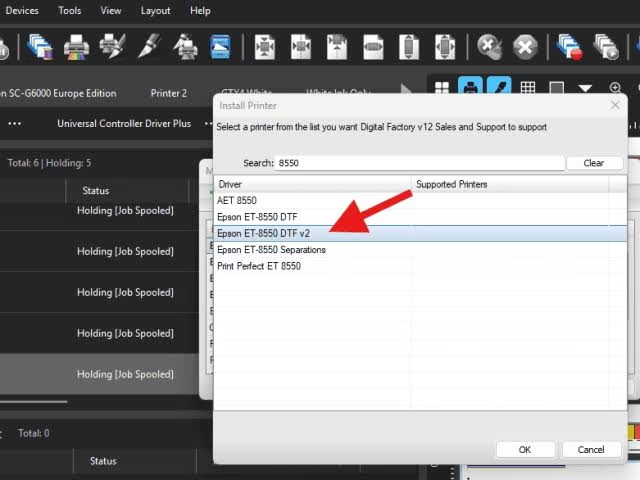
Once CADlink is installed, connect your printer correctly.
Most DTF printers support:
- USB connection
- Ethernet (LAN)
- Network printing
Open CADlink and verify that your printer appears in the printer list.
If the printer does not appear:
- Restart the printer.
- Reconnect the USB cable.
- Verify Windows recognizes the printer.
- Reinstall the printer driver if necessary.
Creating a New Print Queue
Print queues determine how CADlink communicates with the printer.
To create one:
- Open CADlink.
- Select Add Printer.
- Choose your printer model.
- Select the proper driver.
- Choose the correct port.
- Save the configuration.
The software is now ready to receive artwork.
Importing Artwork into CADlink
CADlink supports multiple file formats including:
- PNG
- TIFF
- PSD
- AI
- EPS
- JPEG
For best DTF quality:
- Use transparent PNG files.
- Design at 300 DPI.
- Keep artwork at actual print size.
- Use RGB or the recommended color space for your workflow.
Understanding how to use CADlink DTF correctly during artwork preparation helps prevent printing errors and improves overall print quality.
How to Use CADlink DTF for Artwork Preparation
Before printing, verify the following:
- Correct dimensions
- High resolution
- Transparent background
- Proper alignment
- Sharp edges
- No hidden layers
Clean artwork produces cleaner transfers.
Mirror the Design
DTF transfers must be mirrored before printing.
Most CADlink printer profiles automatically mirror the artwork.
Always verify this setting before printing.
Configuring White Ink
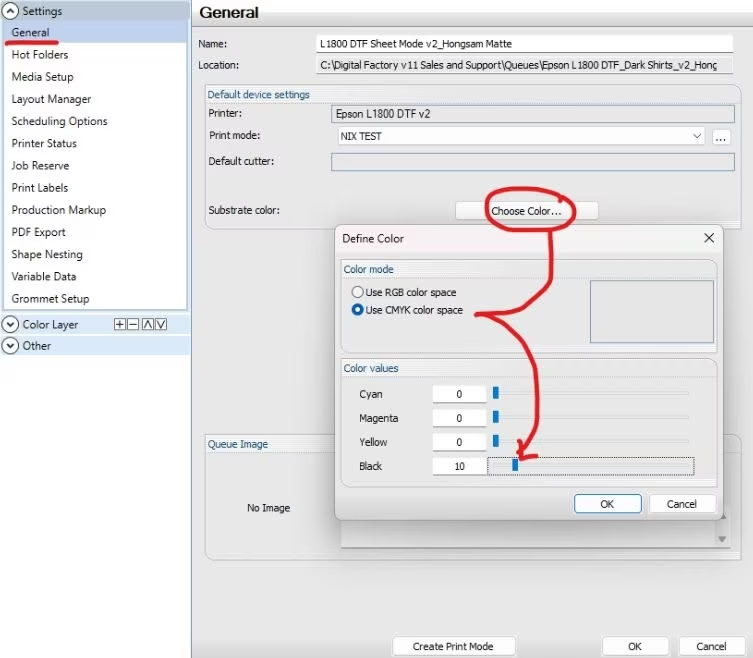
One of CADlink’s strongest features is automatic white ink generation.
Open the White Ink settings.
Adjust:
- Underbase density
- White choke
- White spread
- Highlight white
- Spot white
A properly configured white layer creates brighter colors and stronger opacity on dark garments.
Selecting the Correct ICC Profile
Color accuracy depends on using the proper ICC profile.
Choose the profile that matches:
- Printer model
- Ink manufacturer
- PET film
- Print resolution
Incorrect ICC profiles may produce:
- Dull colors
- Color shifts
- Banding
- Oversaturation
Always use the profile supplied for your exact printer and ink combination.
Choosing Print Resolution
Resolution affects quality and print speed.
Common settings include:
| Resolution | Best For |
|---|---|
| 720 × 720 | Fast production |
| 720 × 1440 | Daily printing |
| 1440 × 1440 | High-quality transfers |
| 1440 × 2880 | Premium photo printing |
Higher resolutions create smoother gradients but increase printing time.
Sending the Job to the Printer
Knowing how to use CADlink DTF before sending a job to the printer ensures the correct print settings, white ink configuration, and color profile are applied.
- Preview the design.
- Verify white ink.
- Check print size.
- Confirm mirror mode.
- Press Print.
CADlink processes the artwork before sending it to the printer.
Applying DTF Powder
Immediately after printing:
- Cover the wet ink with DTF powder.
- Shake off excess powder.
- Ensure even coverage.
The powder should stick only to the printed ink.
Curing the Transfer
The powder must be cured before pressing.
Use either:
- Curing oven
- Heat press hovering above the film
Typical curing temperatures:
- 110–130°C
- 2–3 minutes
Do not overheat the transfer.
Heat Pressing the Transfer
Place the cured transfer onto the garment.
Typical settings:
- Temperature: 150–165°C
- Pressure: Medium
- Time: 10–20 seconds
Follow the transfer film manufacturer’s recommendations for the best results.
Cold Peel vs Hot Peel
Different films require different peeling methods.
Cold Peel
Allow the transfer to cool completely before removing the film.
Hot Peel
Remove the film immediately after pressing.
Always verify which type of PET film you are using.
Final Press
For improved durability:
- Cover the design with parchment paper or a finishing sheet.
- Press again for 5–10 seconds.
This improves:
- Wash resistance
- Softness
- Finish
- Adhesion
Managing Print Queues
CADlink allows multiple jobs to remain in the queue.
You can:
- Pause jobs
- Resume jobs
- Cancel prints
- Reorder print jobs
- Duplicate previous jobs
Learning how to use CADlink DTF efficiently also helps reduce printing errors and save production time.
Optimizing Color Accuracy
Professional results require regular color management.
Recommended practices include:
- Calibrate your monitor.
- Use manufacturer-approved ICC profiles.
- Keep print heads clean.
- Replace worn dampers.
- Maintain consistent humidity.
- Store ink properly.
Printer Maintenance
Daily maintenance extends printer life.
Recommended routine:
Every Day
- Nozzle check
- Head cleaning if necessary
- Wipe capping station
- Clean wiper blade
Every Week
- Clean encoder strip
- Inspect ink lines
- Check waste ink tank
Every Month
- Inspect dampers
- Lubricate carriage rails if required
- Check belt tension
Consistent maintenance minimizes downtime and improves print quality.
Common CADlink DTF Problems and Solutions
Printer Not Printing
Possible causes:
- Incorrect port
- Printer offline
- USB disconnected
- Driver issue
Solution:
Reconnect the printer and verify Windows detects it.
White Ink Missing
Possible causes:
- White channel disabled
- Empty cartridge
- Clogged print head
Solution:
Enable white ink in CADlink and perform a nozzle check.
Colors Look Dull
Possible causes:
- Wrong ICC profile
- Incorrect media settings
- Low-quality artwork
Solution:
Load the correct ICC profile and use high-resolution graphics.
Banding During Printing
Possible causes:
- Dirty print head
- Incorrect head alignment
- Low print quality setting
Solution:
Perform head cleaning and alignment.
Transfer Peeling After Washing
Possible causes:
- Insufficient curing
- Incorrect pressing temperature
- Low pressure
Solution:
Increase curing consistency and verify heat press settings.
Tips for Professional DTF Printing
Whether you are a beginner or an experienced print shop owner, learning how to use CADlink DTF efficiently will help you achieve consistent production results.
- Use premium PET film.
- Store film in a dry environment.
- Keep ink bottles sealed.
- Perform daily nozzle checks.
- Print at 300 DPI.
- Use transparent backgrounds.
- Apply powder evenly.
- Cure completely before pressing.
- Use accurate ICC profiles.
- Keep the printer clean.
Once you understand how to use CADlink DTF correctly, producing consistent and professional DTF transfers becomes much easier
CADlink offers advanced production features that make it one of the preferred RIP solutions for DTF printing.
Key advantages include:
- Automatic white ink generation
- Professional color management
- Support for multiple printer models
- Advanced nesting for media savings
- Reliable print queue management
- Fast RIP processing
- High-quality output
- Consistent production workflow
- Excellent compatibility with DTF printing systems
These features help businesses increase productivity while maintaining outstanding print quality.
Conclusion
By following this complete guide on how to use CADlink DTF, you can confidently create high-quality DTF transfers with accurate colors, reliable white ink coverage, and consistent print results. By correctly installing the software, configuring the printer, selecting the appropriate ICC profile, managing white ink settings, and following proper curing and heat pressing techniques, you can achieve consistent, high-quality results on every print.
Whether you are launching a new DTF printing business or improving an existing production workflow, CADlink Digital Factory DTF provides the advanced tools needed for efficient operation, accurate color reproduction, and reliable output across a wide variety of fabrics.
Frequently Asked Questions (FAQ)
Can beginners use CADlink DTF?
Yes. While CADlink includes professional features, beginners can quickly learn the workflow by following the correct printer setup, color management, and print preparation steps.
Does CADlink automatically generate white ink?
Yes. CADlink can automatically create a white underbase and allows users to adjust white density, choke, spread, and highlight settings for optimal opacity.
What file format is best for DTF printing?
Transparent PNG files at 300 DPI are the most commonly recommended because they preserve image quality and eliminate unwanted backgrounds.
Why are my DTF colors different from my screen?
Color differences are usually caused by incorrect ICC profiles, monitor calibration, or printer settings. Always use the ICC profile designed for your specific printer, ink, and film combination.
How often should I maintain my DTF printer?
Perform a nozzle check and basic cleaning every day, inspect components weekly, and complete deeper maintenance monthly to ensure reliable print quality and extend printer life.
Need a genuine CADlink Digital Factory DTF Lifetime License? Visit our website for secure activation, instant delivery, professional support, and remote installation assistance to get your DTF printing workflow up and running quickly.
Add comment